Authentication with Keycloak
Log in to your Concrete site using a Keycloak single sign-on server (with user group and user attribute mappings)
Requirements
This package allows you to log in your ConcreteCMS website by using an OpenID Keycloak server.
We developed this package testing it with Keycloak versions 25.0, 26.1, and 26.2. It may work with other Keycloak versions, as well as with other OpenID servers.
Features
- Support for multiple Keycloak server and/or realms
- Automatically update of ConcreteCMS user attributes and groups (so that they reflect the Keycloak user attributes and groups)
- Built using the OpenID Connect standard: it may work with any single sign-on server that implements that standard
Configuration
ConcreteCMS Client Configuration
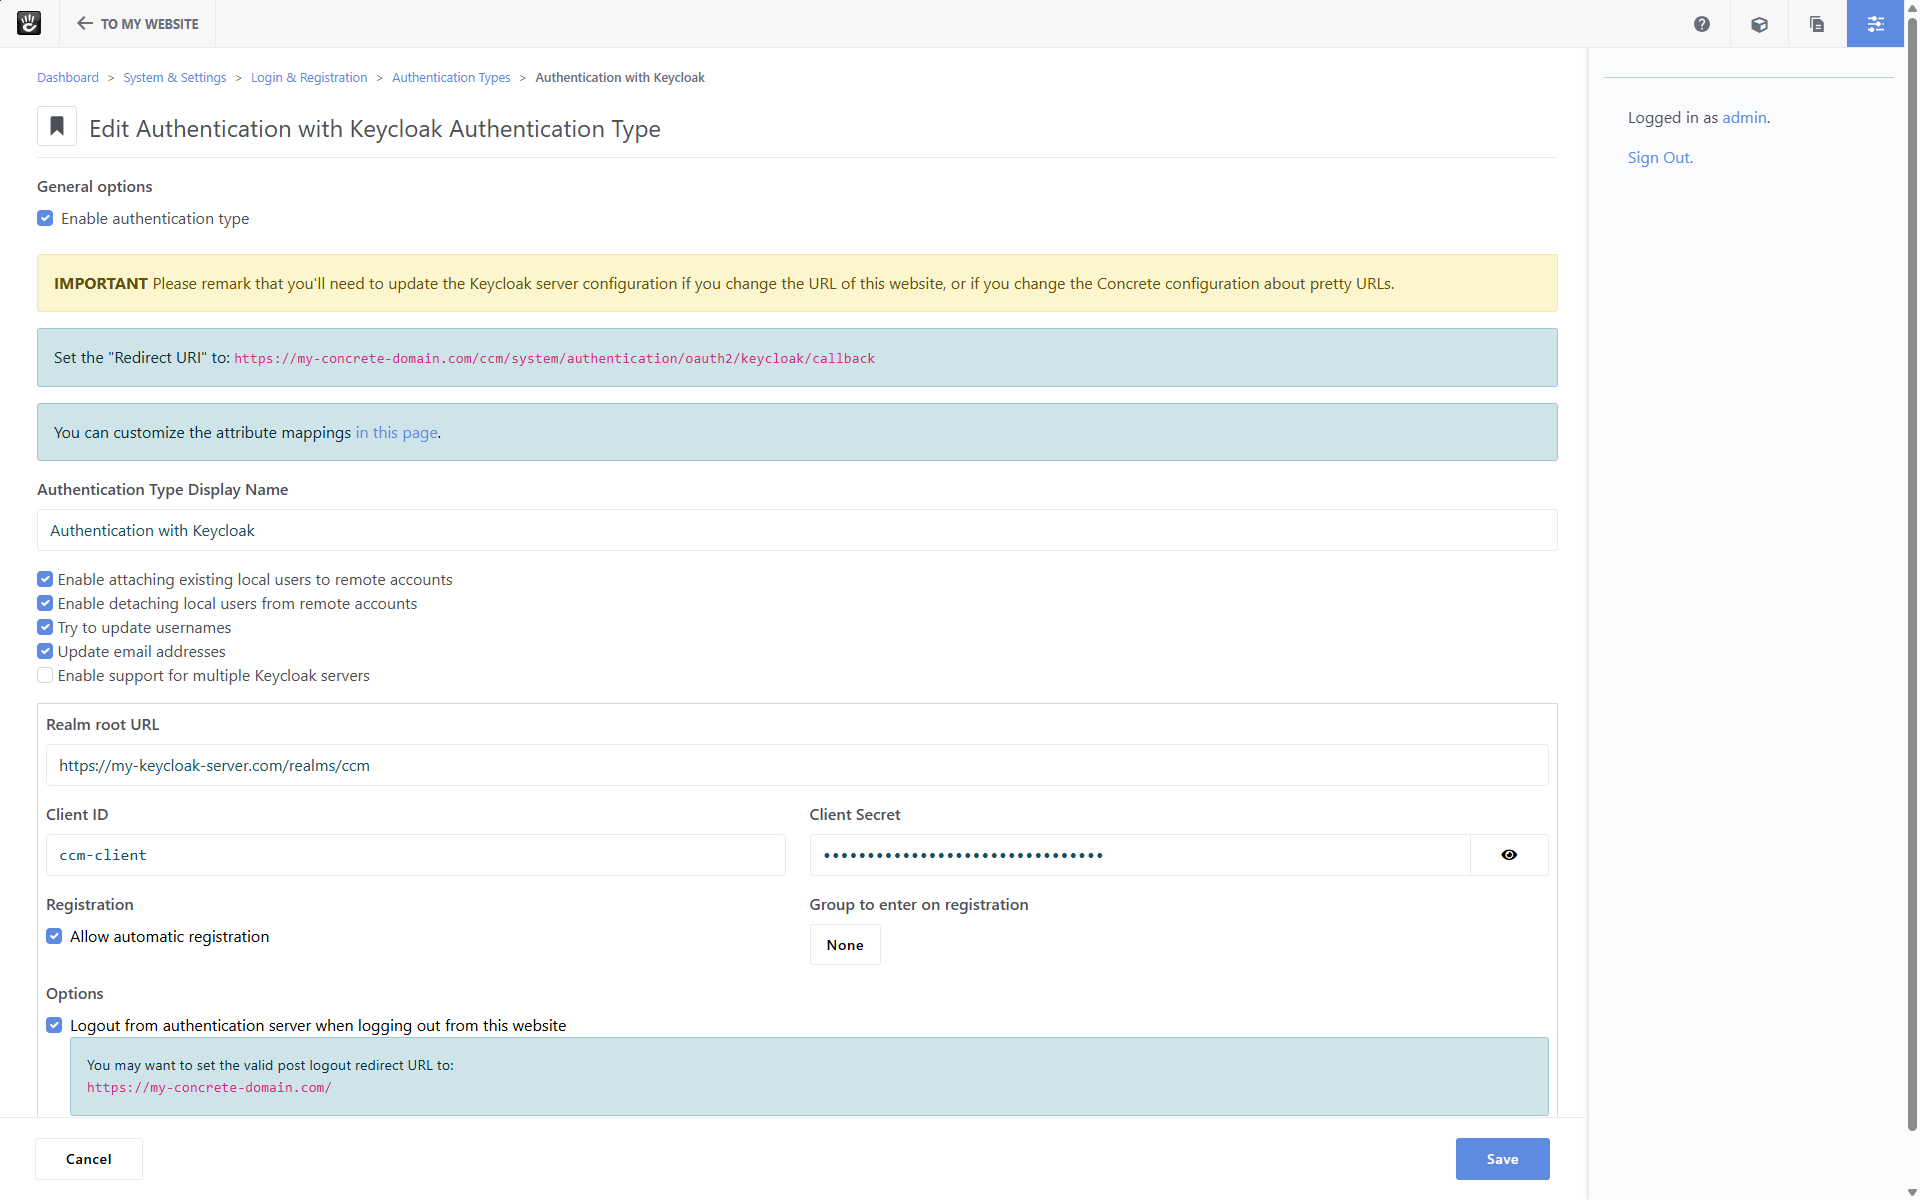
You can configure the Keycloak authentication in the System & Settings > Login & Registration > Authentication Types dashboard page.
There you'll see the Keycloak authentication type: configure it by specifying the parameters of your Keycloak server (see Keycloak server configuration):
-
Enable attaching existing local users to remote accounts
You can enable this option to allow ConcreteCMS users attaching their account to a Keycloak account (for example when they edit their profile in the
/accountpage of the ConcreteCMS website) -
Enable detaching local users from remote accounts
You can enable this option to allow ConcreteCMS users detaching their account from a Keycloak account (for example when they edit their profile in the
/accountpage of the ConcreteCMS website) - Allow automatic registration When users log in with Keycloak, you can turn on this option to automatically create a ConcreteCMS user if none of the existing ones is already associated to that Keycloak user. If you turn on this option, you can also choose a ConcreteCMS user group to be assigned to these newly created ConcreteCMS users.
- Try to update usernames When an existing ConcreteCMS users log in with Keycloak, you can turn on this option to update the username of the ConcreteCMS user so that it matches the one provided by Keycloak. In case a different user already uses the same username nothing will be updated.
- Update email addresses When an existing ConcreteCMS users log in with Keycloak, you can turn on this option to update the email address of the ConcreteCMS user so that it matches the one provided by Keycloak
- Logout from authentication server when logging out from this website You can turn on this option to logout users from your Keycloak server whenever a user logs out from the ConcreteCMS website. Please remark that this option is available since ConcreteCMS v9.2.1.
Keycloak Server Configuration
In the Keycloak Admin Console, switch to the realm you want to use (it's not recommended to use the default master realm).
In the Clients section, create a new client of type OpenID Connect, enabling the Client authentication option and keeping the Standard flow authentication flow enabled.
In the Valid redirect URIs field you should specify the value displayed in your ConcreteCMS website when you configure the authentication type.
Once you created the client, you need to copy its Client ID and Client Secret: they'll be needed in order to correctly configure the ConcreteCMS authentication.
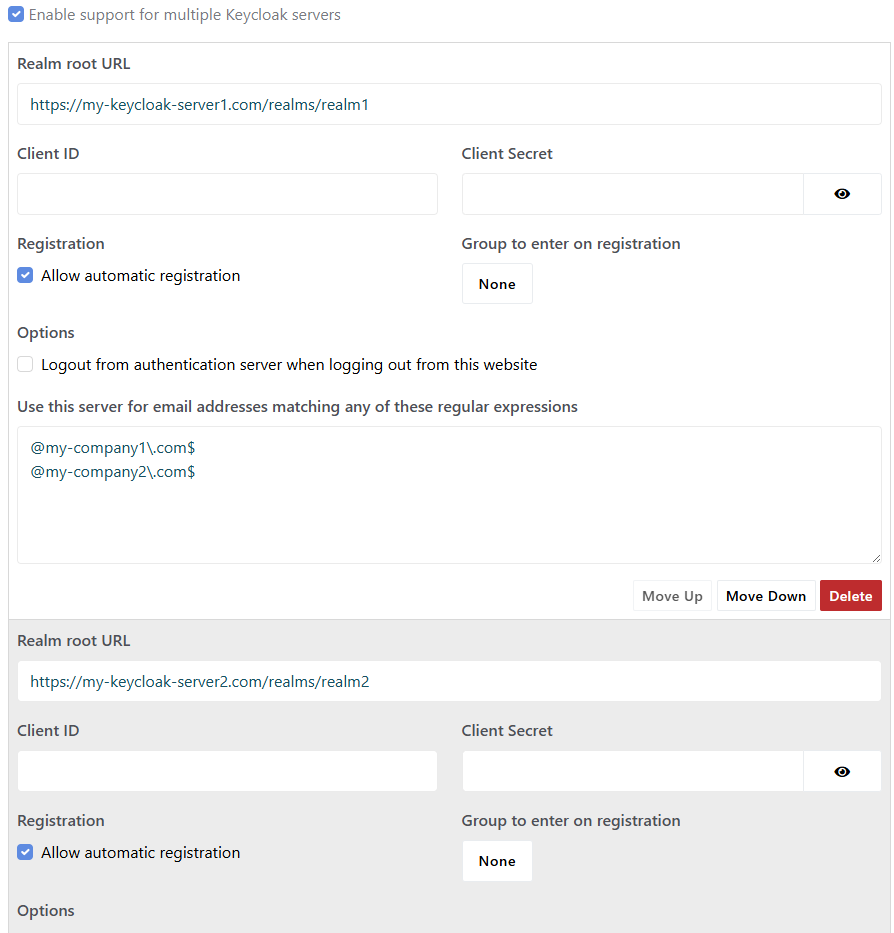
Multiple Keycloak Servers and Realms
The Keycloak authentication also supports multiple Keycloak servers/realms: you can specify one or more regular expressions that email addresses should match to choose a specific Keycloak server and/or realm.
For example, you may want to use a realm for the email addresses that match *@mydomain\.com$, and a second realm for any other address.
Multiple Realms Provided by PHP Code
Advanced users can also manage multiple Keycloak server configurations via PHP code.
First of all, you have to create a PHP class that implements the vvLab\KeycloakAuth\ServerConfigurationProvider interface.
Then you can bind that class. This can be done
- in the
application/bootstrap/app.phpfile, with something like this:$app->singleton(vvLab\KeycloakAuth\ServerConfigurationProvider::class, YourClass::class);
- in the
on_start()method of a custom ConcreteCMS package:public function on_start() { $this->app->singleton(\vvLab\KeycloakAuth\ServerConfigurationProvider::class, YourClass::class); }
Mappings of User Groups and User Attributes
This package can automatically update the ConcreteCMS user attributes and groups to reflect the ones defined in the Keycloak server.
This can be done in the System & Settings > Login & Registration > Authentication Types > Keycloak Mappings dashboard page.
Claim IDs
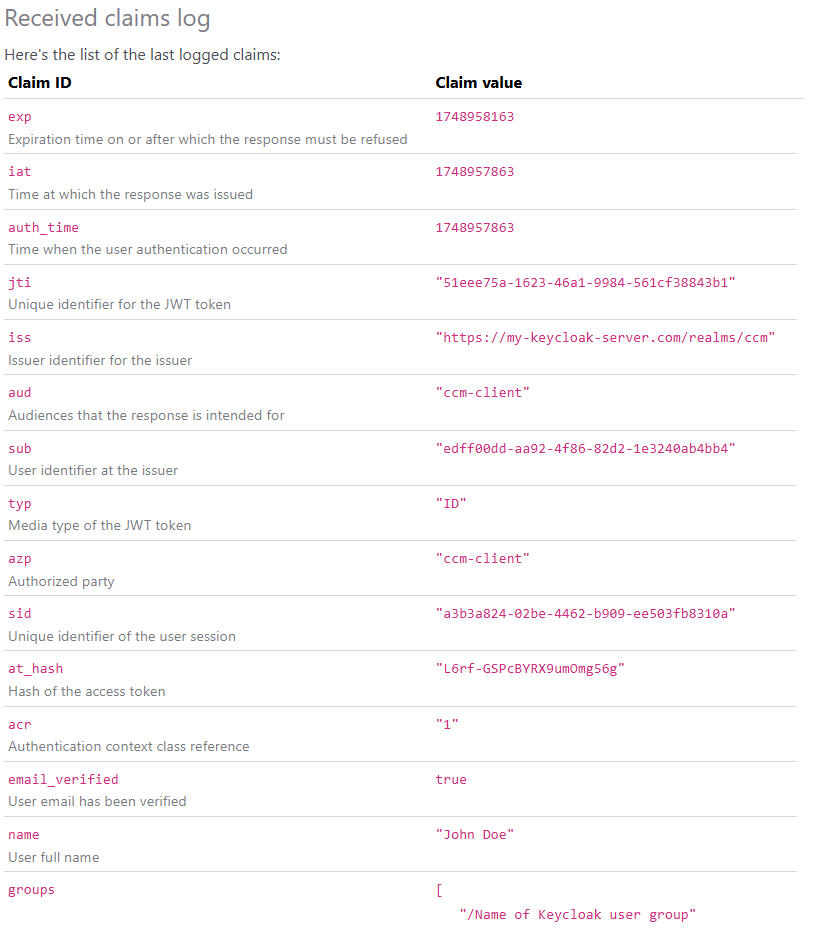
When users log in with Keycloak, the Keycloak server sends Concrete the user details. Every detail is identified by an unique ID (called Claim ID).
In order to inspect the Claim IDs received by ConcreteCMS you can enable a one-time logging session:
- click the Enable log button
- in another browser (or in an incognito browser session) log in by using Keycloak
- close that other browser/incognito session and go back to the Keycloak Mappings dashboard page
- click the Refresh button
You'll see the list of Claim ID and their associated values.
Mapping of User Groups
You may want to manage the user groups in a centralized way, defining them in the Keycloak server.
To ensure that a user is automatically added and/or removed from a ConcreteCMS group, in the Keycloak admin console you have to edit the profile client scope, adding a mapper by using the Group Membership configuration, assigning it a Token Claim Name (for example, user_groups) and instructing Keycloak to add it to the ID Token.
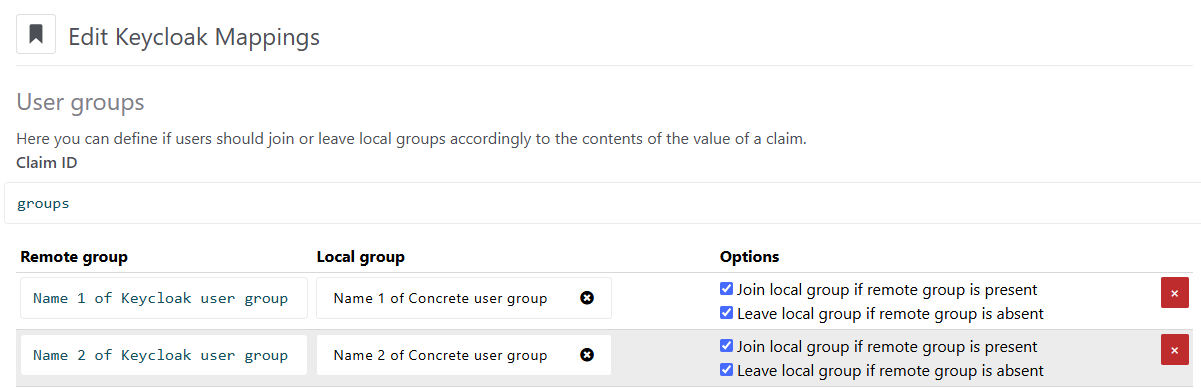
First of all, in the ConcreteCMS dashboard page, you have to enter the Claim ID you specified above (user_groups in the example).
Then, in the Remote group field you can specify the name of the Keycloak user group (either with an absolute path - that is starting with a /, or the relative group name).
You can associate that remote group to a local ConcreteCMS user group.
You can also configure ConcreteCMS so that users are automatically added and/or removed from groups:
- if Join local group if remote group is present is checked, users will be added automatically to the ConcreteCMS user group if the Keycloak user group is received upon login
- if Leave local group if remote group is absent is checked, users will be removed automatically from the ConcreteCMS user group if the Keycloak user group is not received upon login
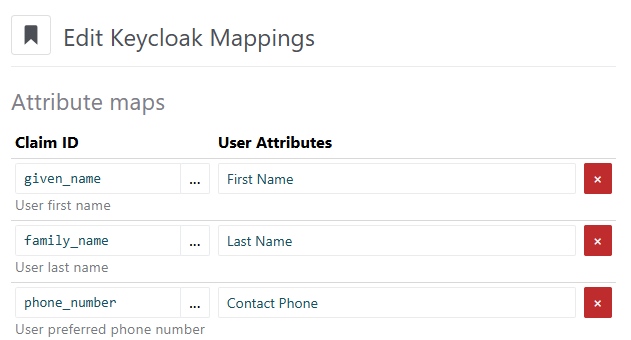
Mapping of User Attributes
You can create/update/remove ConcreteCMS user attributes to reflect the values of the received Clam IDs received in the login phase.
For example, when a user logs in, you may want to update the value of the ConcreteCMS user attributes named First Name and Last Name so that they match the values of the given_name and family_name Claim IDs.
We currently support these ConcreteCMS attribute types:
- Address (handle:
address) - Checkbox (handle:
boolean) - Email (handle:
email) - Number (handle:
number) - Phone Number (handle:
telephone) - Text (handle:
text) - Text Area (handle:
textarea) - URL (handle:
url)
Using a Keycloak Development Server
You can test the Keycloak authentication type by running a development instance of Keycloak via docker.
For example, to create a docker container with:
- container name: keycloak_ccm
- available at http://localhost:8080
- Administrator username: admin
- Administrator password: admin
- Keycloak server version: 26.2.5
You can run this command:
docker create --name keycloak_ccm --publish 8080:8080 --env KC_BOOTSTRAP_ADMIN_USERNAME=admin --env KC_BOOTSTRAP_ADMIN_PASSWORD=admin quay.io/keycloak/keycloak:26.2.5 start-dev
Then you can start that container with
docker start keycloak_ccm
After a few seconds, you'll be able to access the Keycloak server at http://localhost:8080
Open Source!
This package is open source: you can find it on GitHub.
Also Check Out
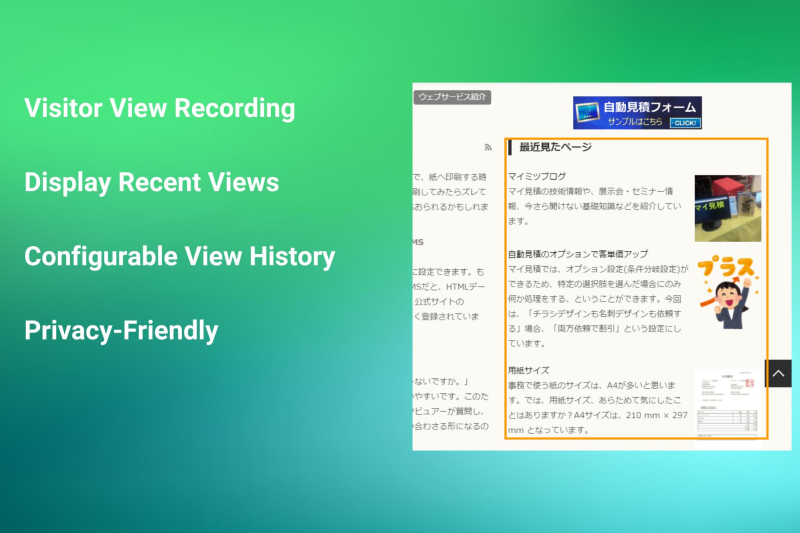
Recently Viewed Page
Visitors views will be stored in his/her localstorage. The Recent Views block will display his/her recent views.

Is this Page Public
Provides a clear indicator on the toolbar about the accessibility status of the current page.

Author

Also Check Out
Recently Viewed Page
Visitors views will be stored in his/her localstorage. The Recent Views block will display his/her recent views.
Is this Page Public
Provides a clear indicator on the toolbar about the accessibility status of the current page.